how to increase maximum upload file size in wordpress all in one migration Tutorial viodeo
Hey guys if your website on google cloud platform.mostly arise this type problems in wordpress but you don’t know how it’s fixed that so i m sure this article will helps you 100%
go to your google cloud platform dashboard and navigate Compute Engine >VM Instanse and click on SSH you will see SSH connect your vm instanse then you have go to your root path of vm instance with help of this command copy and paste it

NOTE: Don’t forget to press Enter key Every Command Line .
sudo -i
NOTE: This command will help you to open your php.ini file This Command For WordPress Deploy
sudo nano /etc/php/7.0/apache2/php.ini
NOTE: If you’re using Bitnami WordPress, your php.ini file is located at:
sudo nano /opt/bitnami/php/etc/php.ini
Now that you have opened your php.ini file,

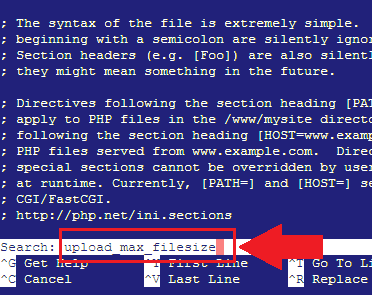
use Ctrl + W to search for upload_max_filesize and press Enter key

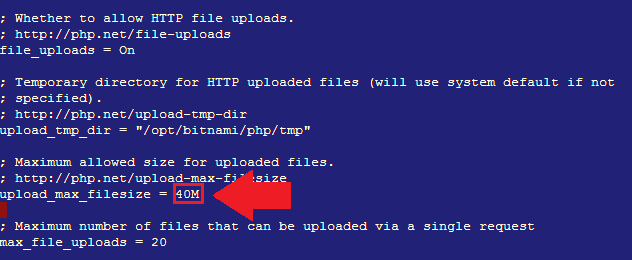
change the existing value to between 40-128M. Then Type Ctrl + O to save changes, then Ctrl +X to exit.
Now the Last step is Restart your Apache
Note: For Click-to-Deploy WordPress, restart your server by command
sudo service apache2 restart
NOTE: For Bitnami WordPress
sudo /opt/bitnami/ctlscript.sh restart apache
I’m sure this article will worked 100% for you thank you!!!!
if you may want increase some additional limits are:
->memory_limit = 64M
->upload_max_filesize = 64M
->post_max_size = 64M
->max_execution_time = 300

